Hip Kit Club: Creating with the Stitching Template

Hello! I’m back with another layout using the beautiful August Kits from Hip Kit Club. Today’s project features the Stitching Template that was included with the July 2023 Embellishment Kit. Watch the video to hear about what I saw on a recent trip that inspired my page design!

HIP HIP HOORAY

Birthdays at our house always begin with presents. The photos can end up looking a bit chaotic with all the different colors of wrapping paper and gifts, so I opted to change them to black and white and let the colors of the August Sunshine & Lemonade collection ‘do all the talking.’ The result is a cheerful page perfect for highlighting a birthday celebration!

Before beginning the page design, I added soft stenciling to the Cloud White cardstock by using the ‘Citrus’ stencil and ‘Squeezed Lemonade’ Distress Oxide ink. I simply used a ink blending brush to apply the ink through the stencil, fading it with a lighter touch as I moved towards the edges.

Next, I went to town fussy-cutting hexagons from the ‘Oh Honey’ paper. I overlapped them in rows, then used the Stitching Template (July Embellishment Kit) to stitch them in place. Next, I bent up the ‘wings’ of each hexagon for a dimensional look, then added additional rows of stitching in between as accents. I LOOOOOOOVE the way this turned out!

I sliced the ‘Orange You Cute!’ paper at an angle to provide an anchor for my three photos. The repetition of the Black Circle Stickers (Clear Stickers – August Embellishment Kit) ties in with the bold black from the Foam Title (Main Kit).

The colorful flowers (Clear Stickers – August Embellishment Kit) and Chipboard Pieces (Main Kit) add so much happy color you can’t help but smile!

I printed my typed journaling onto vellum so that the stenciling on the background could peek through.

Have you tried out the Stitching Template yet? How did you use it on YOUR layout?

AUGUST 2023 HIP KITS USED IN THIS PROJECT:

JanaBold

JanaEubankYouTubeIcon JanaEubankIconFacebook JanaEubankIconInstagram JanaEubankIconPinterest

Starting Points: Using a Mood Board

It happens to the best of us … we get in a rut. We start doing the same thing over and over and our pages start to look the same. Shake things up a bit by using a scrapbook challenge!

Today I am working with a Mood Board by Hip Kit Club. The challenge due date is past, but you can still use it as inspiration for your layout if you’d like.

What is a mood board? It is a series of photos gathered together to inspire your design decisions for your next project. Watch the video below to see how I interpreted the inspiration photos for this challenge.

Here is the mood board that I worked with. The two portions of the mood board that stood out to me the most were the row of rainbow-colored houses in the lower left corner, and the rosette hearts in the center.

BIRTHDAY GIRL

I used a die from my stash to create the rosette hearts from several of the patterned papers included in the January 2023 Hip Kits. Next, I matted punched hearts with white cardstock, then adorned the center of each heart with fussy-cut bows (also from a patterned paper).

I used a file folder-shaped die from my stash to create a home for the title.

Another sheet of patterned paper had soft green, lavender, and blue leaves printed on it. I fussy-cut them out to add even more texture to the rosette hearts. The colors of the leaves matched the soft colors of the mood board, too!

These were so much fun to make and I love how pretty they are!

If you are looking to try something new, why not give a mood board challenge a try? You can find them all around the internet, or use a tool like Pinterest to create your own!

Enjoy your weekend!

JanaBold

JanaEubankYouTubeIcon JanaEubankIconFacebook JanaEubankIconInstagram JanaEubankIconPinterest

Scrapbook Process: January 2023 SCT Sampler

I have been a subscriber to the Scrapbook & Cards Today Sampler kit for almost two years now. It’s so much fun to get a sampling of brand-new products from different papercrafting manufacturers each month. But, I must admit … I have several of these kits that I have not put to use yet.

One of my goals in 2023 is to CREATE with my subscription kits as they hit my doorstep each month. So, before the February SCT Sampler lands on my doorstep, I am sharing this layout today.

The January 2023 SCT Sampler features the adorable Simple Stories Life Captured collection. I LOVE the colors and office-inspired icons of this cute collection.

I began the layout by matting my photo with three layers of 6×8 patterned papers from the kit. I trimmed each layer to a different size each time, so that you can see each of the colorful patterns. I love the way these colors look against the kraft cardstock background!

Next, I used three different sizes of circle punches to create a circle grid to the right of my photo. I then added die-cuts, fussy-cut icons, buttons and enamel dots as decorations on each circle.

The border across the top of the page was created by cutting apart color blocks from a 3×4 journaling card, then stitching them together in a row. A punched border accents the bottom edge of the stitched border. Next, I added journaling strips above the pieced border, along with a few enamel dots as colorful accents.

The buttons weren’t included in the Sampler Kit. I actually received them in the mail that day as part of a grab bag I purchased from Hip Kit Club last week. The colors match perfectly and were a fun additional dimensional detail.

Do you subscribe to the SCT Sampler? What did you create with it this past month?

JanaBold

SUPPLIES USED IN THIS PROJECT:

JanaEubankYouTubeIcon JanaEubankIconFacebook JanaEubankIconInstagram JanaEubankIconPinterest

Simple Stories: Bloom Process Video

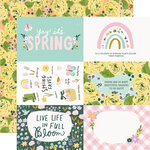
Have you seen the NEW Bunnies & Blooms collection from Simple Stories? Even if you don’t have any Easter or Spring photos to scrapbook, the florals and ‘B’ side patterns make this collection a must-have! I am using it today to scrapbook these photos of my daughter and I enjoying lunch together at her elementary school for her birthday.

NOTE: Scroll down if you’d like to watch the process video for this layout!

Some page designs come together quickly for me, while others are a struggle. This was one of those pages that practically put itself together. LOVE when that happens! You can watch my process in the video below.

I thought the ‘Bloom’ title worked well for this birthday layout, since my daughter was blooming into a young lady. 🙂 I love the floral accents on the title pieces in this collection. This piece is from the Chipboard Stickers, but you can find even more in the pack of Foam Stickers. Yay!

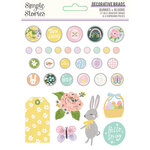
The chipboard title, rose and butterflies add dimension to this project, but to add even more pizazz mix in additional dimensional embellishments like the shiny decorative brads and enamel dots.

The machine stitching and distressed paper edges add texture.

Within the last year Simple Stories has added ‘Tags’ and ‘Journal Elements’ papers to their line-up of cut apart sheets with each collection. I love the journaling options this gives for scrapbook pages. I almost always use a journal spot to write the details on my layouts. That way, if I mess up writing the information, I’m not ruining my entire page. I simply cut out another one and try again! And there are so many different styles, colors, and sizes to choose from on a single sheet. Awesome!

Isn’t the Bunnies + Blooms collection beautiful?! Would you use it to scrapbook Spring or Easter photos? Or would you use it as an ‘everyday’ collection like I did here? Tell me in the comments below!

Have a great day!

JanaBold

SUPPLIES USED IN THIS PROJECT:

Take My FREE Class at Scrapbook.com!

IMG_1376

JanaEubankYouTubeIcon JanaEubankIconFacebook JanaEubankIconInstagram JanaEubankIconPinterest