SCT Magazine: Creating a Pocket Page with the Simple Stories Love Story collection

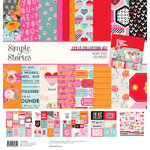
Hello, friends! This week is LOVE WEEK on the Scrapbook & Cards Today Magazine Blog. Today I’m up sharing a lovey-dovey pocket page using the Simple Stories Love Story collection! I think you will agree with me that this collection is totally swoon-worthy with its beautiful, rich color palette and romantic details.

My husband and I were married on January 23rd, so, for me, Valentine’s Day, and celebrating the people I love, begins a few weeks earlier than most people. Life has been busy for both of us lately, so this year, our anniversary celebrations were short and sweet with lunch at a favorite restaurant. 

Even though our photos felt a bit ‘everyday’, I wanted to capture our special day in a beautiful way, so I opted to create a pocket page. We have been married for 27 years now! Yay!


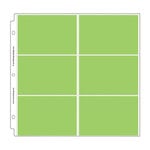
I began with a 4×6 pocket page protector by Doodlebug Design. The first thing I like to do is to create a ‘title’ card for my pocket page spreads. For this one, I used a large, floral doily die-cut as the base, then layered the chipboard ‘Love Story’ overtop with a pair of floral die-cuts. A few Decorative Brads add a bit of shine.

I like to print my photos smaller than the 4×6 canvas, so that I have room to play with patterned paper layers, embellishments, words, and journaling.  Placing the smaller photos and journaling in their own decorated sections makes each one feel highlighted and special on their own, don’t you think?

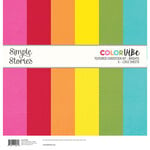
I knew I wanted to use lots of romantic details and embellishments on this layout, so I decided to keep my color palette monochromatic with accents of sage green. I used the same backgrounds on all six slots, alternating between the damask patterned paper and the solid paper.

The damask cards are accented with strips of typewriter paper, and the solid cards have striped border strips. This helps tie everything together. From there, I used Ephemera die-cuts as the base for each embellishment cluster on the different cards. 

Creating embellishment clusters is so much FUN! I always begin with die-cuts, choosing a main image then anchoring it with other shapes. I add words, then sprinkle in things like butterflies, hearts, brads, or enamel dots for dimension.

I hope you enjoyed seeing my pocket page today using the stunning Simple Stories Love Story collection. There are so many romantic, lovely details in this collection and I can’t wait to play with it again! Have you created a pocket page lately?

Happy creating!

JanaBold

SUPPLIES USED IN THIS PROJECT:

JanaEubankYouTubeIcon JanaEubankIconFacebook JanaEubankIconInstagram JanaEubankIconPinterest

Hip Kit Club February 2023 Kit: True Love

Hi Friends! I’m back with another scrapbook page using the beautiful February 2023 Hip Kits. One of the perks of subscribing to the Hip Kit Club is that you have access to FREE cut files that coordinate with each of the monthly kits. Today I am using the Heart Puzzle Solid cut file for the background, and the butterflies from the Love Story cut file. Check it out below!

TRUE LOVE

My husband and I went on a Caribbean cruise last year to celebrate our 25th anniversary. I used the Sea Foam cardstock as the base because I love the way it picked up the aqua color of the tropical water in my photo.

First, I selected the patterned papers that I wanted to use to create the heart puzzle. I opened up the file in my silhouette program and used the fill tool to color in each piece, making sure that I was balancing the colors throughout. Once I was happy with the way it looked, I pulled the puzzle pieces apart and grouped them according to color to cut from each of the patterns.

After assembling the background I used my sewing machine to stitch an outline around the entire heart with black thread.

The chipboard floral stickers and puffy hearts from the Embellishment kit look so pretty adorning each corner of the heart. I also added white leaf stems cut using the Hoop & Floral metal die set.

I used the largest embroidery hoop die from the Hoop & Floral metal die set to frame my photo. I love that the hoop dies are wide enough to stitch on. They are also great for making shakers, too!

A couple of small butterflies from the Love Story cut file adorn the right side of the heart above the photo.

I added a larger butterfly from the same Love Story cut file to the left of the journal tag (Embellishment Kit).

The journal tag is stamped with a phrase from the stamp included with the February Pocket Life Kit. I also added several vellum die-cuts from the Main Kit. The date is stamped with the date stamp from the January Pocket Life Kit.

Included in the February Main Kit was this GORGEOUS acrylic piece. I created a shadow layer for it with vellum. It made the perfect title!

Finally, I added a sprinkle of white acrylic paint over the design to tie everything together. I LOVE the way this page turned out!

Let me know if you have any questions about my design! For daily scrapbooking inspiration be sure to follow the Hip Kit Club Instagram page, Facebook Group, and YouTube channel.

FEBRUARY 2023 HIP KITS USED IN THIS PROJECT:

See you again soon!

JanaBold

JanaEubankYouTubeIcon JanaEubankIconFacebook JanaEubankIconInstagram JanaEubankIconPinterest

February Hip Kits: Creating with the Nested Hearts Dies

Hello! I hope you are having a great start to the week. Today I am sharing a layout I created using the February 2023 Hip Kits. My assignment was to scraplift a fellow design team member with a focus on one of the products.

I chose to scraplift a beautiful layout by Anke Kramer. Click on the image below to watch the process video.

First, here is the layout by Anke that I used as my inspiration. She spent hours stitching over a design on a patterned paper featuring a series of circles. I decided to replace the circles with layered hearts, created with the February 2023 Nested Hearts Dies.

And here is my layout! Anke used a stencil to create a textured pattern on her white cardstock background. Since my paper already featured a tonal pattern, I opted to skip that step.

Anke stitched over the starburst pattern featured in the center of each of the circles. I let the stitching details of the Nested Hearts dies shine and simply used my sending machine to add a zig-zag stitch down the center of each stacked heart.

After deciding the placement of the hearts, I filled in the spaces with vellum die-cuts and flower chipboard pieces from the February 2023 Embellishment Kit.

I matted my photos with black and white floral paper, then added my title to the bottom left corner. Both the puffy alphabet stickers and the bird die-cut come from the February 2023 Main Kit. The title is sitting on a label die-cut from the February Embellishment Kit.

I used another label from the February Embellishment Kit for my journaling, then stamped the date using the date stamp from the January 2023 Pocket Life Kit. There are several years included on the stamp set, but I needed one for ‘2017’ … I simply combined the ’20’ and ’17’ together to create the right year. Easy peasy!

Finally, I finished off the page with splatters of watered-down white acrylic paint. This is ALWAYS the scariest part for me! I never know if it will ruin my page (that I just spent so much time creating), or complete it. Thankfully, this time, it felt like the perfect final touch. Whew!

Do you have the February 2023 Hip Kits at home? Come join us in the Hip Kit Club Facebook Group and share your creations! Even if you’re not a subscriber to Hip Kits [yet! … *wink*], it’s an inspiring place to hang out! All are welcome!

Hope to see you there!

JanaBold

JanaEubankYouTubeIcon JanaEubankIconFacebook JanaEubankIconInstagram JanaEubankIconPinterest

SCT Love Week: Heart Eyes Mini Album!

Hello, Friends! Today I am sharing my FIRST project for the Scrapbook and Cards Today Magazine Creative Team. What a thrill it is to be a part of this group of talented designers. I have followed and learned from these ladies for years. I can’t wait to create alongside them this year. Thank you to Catherine and the SCT Team for giving me this opportunity!

Becki AdamsWendy Sue AndersonMeghann AndrewVictoria CalvinMari ClarkeNathalie DeSousaLisa DickinsonMindy EggenJana EubankPaige EvansJess ForsterDilay NacarVirginia Nebel, Latisha Yoast

This week on the SCT Blog it is LOVE WEEK! We are celebrating all things hearts, flowers, chocolate, and the people we ADORE!

For my project, I created a lovey-dovey, Valentine mini album using the Simple Stories Heart Eyes collection. This album is the perfect gift for the one you adore. Fill it with favorite photos of the two of you along with memories and stories that you hold dear.

When designing a mini album, I like to start with the front cover first when I have all of my supplies to choose from. This allows me to select my favorite pieces from the collection and create a design with a big impact that will beckon the viewer inside.

For this cover, I paired a couple of large heart stickers (Cardstock Stickers) with a fussy-cut heart from the 6×8 paper pad to create a cascading design on the front cover. I placed the ‘LOVE’ title (Foam Stickers) on the largest heart. I added more texture to the foam title by tying white twine around the first letter, then adhering shiny Decorative Brads to the last letter. The brads are my favorite! There is just something about those little cuties that makes me want to place them EVERYWHERE!

Making a mini album is easy when you begin with a Simple Stories 6×8 SN@P! Binder. The binders come in a wide variety of colors to coordinate with your project. (Have you seen the THREE Limited Edition colors they released this spring? Wowza!) Before decorating the binder, I used tape to mask off the pink linen binding and then painted the kraft portion of the album with white paint. After the paint was dry, the album was ready to decorate!

The album includes insert pages, pocket pages, and chipboard tabs. I opted to use one of the pink insert pages as the foundation of my title page. I layered together a few of the 6×8 patterned papers, then added a Chipboard FrameJournal Bits & Pieces die-cutsChipboard pieces, and Decorative Brads to frame my focal point photo. I plan to put my favorite photo of my husband and me on this first page.

The Foam Stickers create stunning titles with lots of dimension and are used throughout my album. Of course, I had to add adhesive Decorative Brads throughout as well. They are the perfect finishing touch for each spread!

The pocket pages inside the 6×8 Binder are so easy and fun to use! I like to treat each individual pocket as a mini layout, layering up patterned papers and adding my favorite embellishments to highlight my photos and journaling. On the right page, you can see I even added an interactive element to one of the pockets by designing a shallow pocket that contains two tags. One tag will hold journaling, and the other a small photo.

Don’t forget to include the story of how you and your loved one met! The journal insert pages provide lots of room for all of the important details. I used the Clear Stamps with coordinating Color Vibe cardstock to create a banner across the top of the journal page, then embellished the lower portion of the page with additional accents.

I created a short video of this album if you would like to see it ‘in action’. Also in that video, is a flip-thru of a 4×6 Flipbook I created using the same Simple Stories Heart Eyes collection. Click on the video below to watch!

Grab your favorite supplies and create a mini album documenting all the reasons you care for the one that you love. What could be better this Valentine’s Day?

See you next time!

JanaBold

SUPPLIES USED IN THIS PROJECT:

Take My FREE Class at Scrapbook.com!

IMG_1376

JanaEubankYouTubeIcon JanaEubankIconFacebook JanaEubankIconInstagram JanaEubankIconPinterest