Simple Stories Pet Shoppe: Puppy Love

Are you a pet lover? When my daughter was living away at college, she and her roommates were missing their dogs so much that they decided to visit a local pet store together to get some critter cuddles. Today I am documenting that memory using the Simple Stories Pet Shoppe Dog collection and a January 2021 PageMaps sketch. Click on the video below to watch!

I just have to give a shout-out to Becky Moore for her PageMaps sketches. She has been inspiring us with her designs for YEARS! In fact, she is celebrating 17 years in 2023. That is amazing! Congratulations, my friend! And a HUGE THANK YOU as well. Whenever I am feeling stumped as to where to start on a page, get out of my comfort zone, or zone out and just have fun creating I can always count on my binder of sketches printed from the PageMaps.com site. Thank you for your generosity all of these years.

Okay, on to my page!

PUPPY LOVE

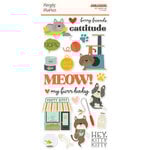
Earlier this year, Simple Stories released a series of pet collections. Pet Shoppe, Pet Shoppe Dog, and Pet Shoppe Cat. Each collection features critter-specific papers, but all of the B-sides of the papers work beautifully across all three sets. The general patterns would even work well for ‘everyday’ or masculine photos as well. In today’s layout, I will be using the Pet Shoppe Dog collection.

I rarely use washi tape on my pages, but this sketch included a few strips in the top-left corner of the main photo that inspired me to get out of my comfort zone. I layered the ‘Woof’ tape together with the dog bone tape and love the results! I used another strip of the ‘Woof’ washi tape at the bottom of the page to anchor the puppy with his dog bed (see photo above).

The Foam Stickers by Simple Stories always make it easy to add a title to your scrapbook page. For the title below, I cut away the word ‘Puppy’ from one sticker and combined it with the larger ‘LOVE’ sticker to fit the circle. A few more foam sticker hearts and a sprinkle of shiny, adhesive, decorative brads add more detail.

I used more of the Foam Stickers to create a scene at the bottom of the page.

Stitching around the background, red pawprint paper, and circle add texture to the layout. I added more softness to the page by wrapping twine around the bottom of the vertical photo with a few tiny tags (Pet Shoppe Dog Bits & Pieces).

Thanks for coming by today!

JanaBold

SUPPLIES USED IN THIS PROJECT:

JanaEubankYouTubeIcon JanaEubankIconFacebook JanaEubankIconInstagram JanaEubankIconPinterest

Scrapping with the SB.com 6×8 Berry Sweet Paper Pad

Happy weekend! Are you doing any scrapbooking today? I have a layout to share with you featuring the SUPER CUTE ‘Berry Sweet’ 6×8 paper pad from Scrapbook.com. Let’s get started!

DECADE DAYS

My daughter’s 5th-grade teacher devised a fun idea to fill the days during the last week of school. She told the kids that they could dress up in any decade. My daughter chose to utilize our 50s poodle skirt costume for the day. Doesn’t she look cute?!

I selected the pink and black patterned papers from the ‘Berry Sweet’ 6×8 paper pad and cut a series of 2.5″ wide strips to layer together in the background. NOTE: The pink striped paper is slightly larger than 2.5″ so that there would be a pink strip on both edges of the strip.

Next, I matted my photos with the dark pink solid paper from the pad, then added a piece of the A2 Honeycomb Background Die behind for some texture. A die-cut tab adds a pop of blue to this corner of the layout.

I used cardstock scraps from my stash, along with my Silhouette Electronic Die-Cutting machine and an image from LetteringDelights.com (Image Set: Indognito) to create this stylish poodle. I love that the poodle is wearing a necklace just like my daughter!

I also die-cut a speech bubble, then stamped it with a sentiment from the Scrapbook.com ‘Happy Little Sentiments’ stamp set. This set is a great one to have since it works well for both cards AND scrapbook layouts.

I used more Scrapbook.com dies to create the title and flower accents for my page. The title was created using the Bold Basic Letter dies (I reach for this die set ALL the time!). I die-cut two layers of blue cardstock and then stacked them together using the 1/8″ foam strips for lots of dimension.

I love all of the different sizes and shapes of flowers in the Scrapbook.com Sunny Lane Florals dies. There are endless ways you can stack these! I used the smallest daisy flower in white (2 layers), then added a tiny blue flower and dark pink circle flower center. The black leaf branches are also created with the Sunny Lane Floral dies!

A few clear gems scattered around the page adds a bit of shine to finish things off!

Thanks for stopping by today. Have a happy weekend!

JanaBold

SUPPLIES USED IN THIS PROJECT:

JanaEubankYouTubeIcon JanaEubankIconFacebook JanaEubankIconInstagram JanaEubankIconPinterest

Stashbusting: Scraps & My Mind’s Eye MEOW

I started this page thinking that I would use the My Mind’s Eye MEOW collection but ended up only using 2 papers and the embellishments. Everything else was brought in from my scrap bin. Take a look!

BRINGING HOME PHOEBE

I began this layout with the kitty faces sheet of text-weight paper you see in the background. This paper is by American Crafts and is sold at Joann. I purchased it several years ago, so I’m not sure if it is still available, but I missed out grabbing a sheet of it when it was originally offered as part of a Crate Paper collection and just had to have it because the little kitten faces reminded me of our Phoebe.

Next, I pulled in papers from my stash and scrap bin that matched the My Mind’s Eye MEOW collection. I used papers from Park Lane (Joann) Simple Stories, and My Mind’s Eye.

All of the cute die-cuts are from the My Mind’s Eye MEOW collection. My Mind’s Eye headquarters is 15 minutes from my house and I was lucky enough to pick up several items from this collection from one of their warehouse sales a few years ago. I am a proud cat lady, so I knew I would get some good use out of these pieces.

My little Phoebe cat is white and gray with a little pink nose … she matches this collection perfectly! I love that they also added in a pop of lime green with the pink/black/white/grey, it gives this color scheme a modern feel.

I created my title using letter sticker from October Afternoon and two alphabet die sets. The smaller letters were created from the Spring Type alpha dies by Sizzix. The larger letters for the word HOME were created using a die set by KS Craft.

I typed my journaling in a circle shape using Adobe Illustrator, then cut it out using Hero Arts circle dies.

I love putting my stash to use and love the way this page turned out. I hope it inspired you to grab a set of embellishments from your stash and then select papers and scraps to go with them for your next layout. I think you will be amazed with what you can come up with!

Thanks for coming by!

JanaBold

SUPPLIES USED IN THIS PROJECT:
My Mind’s Eye ‘MEOW’ collection (2017)
Cardstock: Simple Stories Color Vibe, Co’ordinations, Scraps from my Stash
Patterned Papers: American Crafts, Simple Stories, My Mind’s Eye
Large Alphabet Die: KS Craft Alphabet Die Set

JanaEubankYouTubeIcon JanaEubankIconFacebook JanaEubankIconInstagram JanaEubankIconPinterest

Simple Stories: MEOW

Our pets are our sidekicks, our furry friends, and our companions. They are an important part of our lives and definitely deserve a spot in our memory keeping.

Do you have a couple of furry friends at your house? Or perhaps you have a feathered friend? Or a slippery slunk? Whichever type of critter keeps you company, Simple Stories has a Pet Shoppe collection perfect for YOU!

Check them out at the following links: Pet Shoppe, Pet Shoppe – Cat, and Pet Shoppe – Dog.

MEOW

Today I am sharing a layout I created with the Simple Stories Pet Shoppe – Cat collection. It’s a simple design that becomes elevated with different textures by using a combination of die-cuts, foam stickers, and decorative brads. Take a look!

My cats, Ozzie and Phoebe, are my constant companions. They keep me company throughout the day while I am scrapbooking, on the computer, or working around the house. They are so loyal and patient as they follow me everywhere. I keep thinking they will get bored watching me do the same ‘ol thing every day, but they happily curl up for a ‘cat nap’ while they wait for me to do what I need to do.

I love all the different cats in the Pet Shoppe – Cat collection. I added one of them at the top of the page, peeking out from behind the heart die-cut, and another peeking out from behind my journal tag on the right side of the page.

There were several title options included in the embellishments for the Pet Shoppe – Cat collection; however, I wanted something a bit larger. I chose to fussy-cut the ‘M-E-O-W’ letters from one of the Element papers. The scale was perfect and I loved how the colorful letters repeated the colors of the heart paper above.

This journal tag cracks me up … ‘Here’s the Scoop’ … how perfect is that for a cat page?! The tag had a litter box in the lower-right corner, but I wanted it to be a bit larger, to match the scale of the other cat items on the page.

I found another litter box icon in the Sticker Book, mounted it on cardstock, and then placed it over the existing litter box printed on the tag. It worked perfectly!

A bit of black stitching around the edge of the patterned papers and a little bit of twine on the journal tag add additional texture to the layout.

Make a goal to scrapbook your pet this week. Creating this page was so fun and definitely put a smile on my face.

Enjoy your week!

JanaBold

SUPPLIES USED IN THIS PROJECT:

Take My FREE Class at Scrapbook.com!

IMG_1376

JanaEubankYouTubeIcon JanaEubankIconFacebook JanaEubankIconInstagram JanaEubankIconPinterest