
This week the Hip Kit Club design team has been scraplifting ourselves. I chose to use a layout I created in 2012 using the BasicGrey Lucille collection. Click on the following image to see the process video, or keep scrolling to read the post.

First, here is my page from 2012 that I used as inspiration for my layout

And here is the page I created using a mix of the January, February, and March Hip Kits. Instead of using two smaller photos, I combined them together into one larger 6″ x 4″ photo.
EASTER MEMORIES

Along with scraplifting myself, my assignment was to use the current March 2023 kits mixed with older Hip Kits. Everything on this page is from the March Hip Kits, except for the coral floral paper on the left, the multi-colored herringbone paper behind the photo, and the woodgrain scallop on the right.

In the upper left corner of the page, I replicated the scattered buttons on my BasicGrey page by adding a sprinkle of bees (Simple Stories Sticker Book – March Embellishment Kit) and Pinkfresh Studio chipboard flair (March Main Kit).

I wanted this page to have a springtime, Easter vibe, I fussy-cut the florals from a paper in the March Main Kit, then added in die-cut leaves (Twig + Frond dies). I also die-cut the leafy wreath from the Leafy Wreath + Bow die set to hug the corners of my photo.

I layered together several Pinkfresh Studio Ephemera pieces (March Main Kit) under the bottom of the photo, using one of them to build my title along with the Pinkfresh Studio puffy letters (March Main Kit). Another chipboard flair piece and more fussy-cut bees are scattered among the die-cuts to tie everything together.

Finally, I used the ink droplet stamp and the ‘Oh, Boy!’ ink from the March Color Kit to accent the edges of each flower cluster.

I LOVE the way the Hip Kits all work together and had so much fun combining the different patterned papers from the January, February, and March Hip Kits for this Easter page.
MARCH 2023 HIP KITS USED IN THIS PROJECT:
- March Main Kit
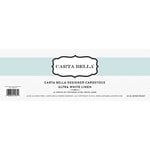
- March Cardstock Kit
- March Embellishment Kit
- March Color Kit
- March ‘Twig + Frond’ Dies
- March ‘Leafy Wreath + Bow’ Dies
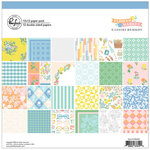
- Patterned paper from the January Kits
- Patterned paper from the February Kits
Be sure to stop by the Hip Kit Club blog, Facebook Group, or YouTube channel for more inspiration from the design team!