Scrapbook & Cards Today Magazine: First Day of School

Let’s add lots of lovely layers to our page today! Hi friends! Today I’m sharing the process video for a layout I created for the Fall issue of Scrapbook & Cards Today Magazine using the beautiful Die Cuts with a View ‘Pocket Full of Flowers’ paper pad.

FIRST DAY OF SCHOOL

I have always loved the fall and going back to school and I especially love seeing the ‘First Day of School’ photos of everyone’s kids. Their eyes are always so full of excitement and hope for a fun-filled year ahead.

I give you lots of tips for selecting patterned papers for your layers in the video, but the main thing you want to look for is contrast. Contrast in colors, pattern, scale, etc. Here you can see I have graphic patterns, like the polka dots and grid, mixed together with florals.

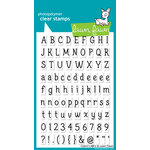
I created my own title using letter stamps and dies. The tile letters were created with the Lawn Fawn ‘Claire’s ABCs’ stamps. The ‘school’ word was created using the Scrapbook.com Bold Basics dies with Simple Stories Cornflower cardstock. I layered contrasting color behind the openings of the letter ‘o’s for a splash of color.

Working with paper pads can be tricky sometimes because there usually aren’t coordinating embellishments to purchase to go along with the patterned papers. For this layout I fussy-cut larger images from the ‘Pocket Full of Flowers’ papers to create embellishments. I used the pocket, water pitcher, and phrase from the cut-apart sheet, then, fussy-cut the butterflies and flowers from patterned papers.

Layer together two butterflies of the same size with thin foam tape. Fold up the wings of the top butterfly to create a dimensional look.

Here I layered together several single flowers to create my own flower cluster. This is a great way to balance colors on your page and create a custom look.

I hope you enjoyed seeing all of the ways you can add layers to your scrapbooking using patterned paper. Will you be giving these techniques a try?

JanaBold

SUPPLIES USED IN THIS PROJECT:

JanaEubankYouTubeIcon JanaEubankIconFacebook JanaEubankIconInstagram JanaEubankIconPinterest

Hip Kit Club: Creating a Layout with Multiple Cut Files

Hello and Happy Fall! Today I am sharing a new layout on the Hip Kit Club blog showing you how to combine two different cut files on one project. I am using the ‘September’ title Cut File and the Floral Medley Cut File. They complement one another perfectly and add a custom feel to this page.

SEPTEMBER

I began this layout with a photo of my daughter on her first day of college. I double- matted my photo, then cut out the FREE cut file for September, the ‘September’ word, to use as my title. I placed these in between the two rainbows on the ‘Go For It!’ paper from the Main Kit. Before adhering them to the page, I used my sewing machine to add stitching around the perimeter of the page, and in between each stripe of the rainbows.

Next, I created my own flower and leaf embellishments using the Floral Medley cut file. I stacked three layers of the flowers together and then added a wood button to the center. They turned out so CUTE!

I cut out leaves using a variety of colors from the Cardstock Kit, then arranged the flowers and the leaves around the ‘September’ title. I used only two of the images included with the Floral Medley cut file, but there are seven different images included. They are so CUTE, so be sure to pick this one up to add to your cut file library!

Next, I created two embellishment clusters in the top-left and bottom-right corners of the page using Cardstock die-cuts, Chipboard Pieces, and a couple of puffy stickers.

A sprinkling of the ‘Dip Your Toe Teal’ Magicals from the June Color Kit adds to the fun, vibrant feel of this layout.

This rainbow paper is one of my favorite sheets this month. I love the way it frames the cut files that I combined together for my page title. Do you enjoy using cut files on your projects?

SEPTEMBER 2023 HIP KITS USED IN THIS PROJECT:

JanaBold

JanaEubankYouTubeIcon JanaEubankIconFacebook JanaEubankIconInstagram JanaEubankIconPinterest

Scrapbook & Cards Today Magazine: Creating a Double-Page Layout

Do you enjoy creating double-page layouts? They come in handy when you have lots of photos of an occasion, or even when you would like more space to add a long story. Today, I’m sharing a double-page layout that I created for the Fall issue of Scrapbook & Cards Today Magazine using the Die Cuts with a View ‘Humble Abode’ paper pad.

HOME AWAY FROM HOME

One of my favorite strategies for creating continuity on a double-page layout is repeating similar elements across both sides of the layout. You can do this by using patterned paper, embellishments, color, and shapes.

The title is created using an alphabet stamp/die set by The Stamp Market. I love that I was able to customize the colors with embossing powder to match the navy/pale blue background paper.

All of the ’embellishments’ on this layout were fussy-cut from the patterned papers. If you are unsure of how to use large-scale patterned paper, try cutting out the images and using them as die-cuts for your projects.

I wanted to visually connect each embellishment cluster together. To do this, I added fussy-cut vines (DCWV patterned paper) and die-cut hearts (Heffy Doodle Whole Lotta Hearts Die).

I created my journaling on the computer, then cut it out using a series of oval dies by Cottage Cutz. I used Adobe Illustrator to create an oval text box the same size as the oval die so that everything matched up perfectly.

Stitching and tiny, clear gems add texture to this page.

When is the last time you created a double-page layout?

JanaBold

SUPPLIES USED IN THIS PROJECT:

JanaEubankYouTubeIcon JanaEubankIconFacebook JanaEubankIconInstagram JanaEubankIconPinterest

Let’s Make a School Layout with Pocket Cards

Today I am scrapbooking with a new-to-me paper company … Rosie’s Studio. I’m not sure where I initially heard about them, but I have been ordering their collections and finally set aside some time to get into one. The collection I am using today is called ‘Work of Heart’. It features lots of school supplies, but could also be used for layouts about creativity and every day, artsy fun!

NOTE: This ENTIRE collection is on sale right now for only $20 (at the time of writing this post). The shipping might be high, depending on your location, but for everything that you get, it’s still a great deal. WOW!

MY KIDS ARE COOL

This week I am sending my last child to school for the last time for her senior year in high school. This makes me a little sad because I LOVE Back-To-School time! Thank heavens I still have some photos from the past to get caught up on. The photos I’m scrapbooking today are actually from the LAST day of school … but it still works for me!

I began this layout by matting each photo with pocket cards. I also used the pocket card that looks like a composition notebook as a layer, and another horizontal pocket card for my title/journal block.

I added gold paper clips from my stash to accent each photo, as well as die-cuts and puffy stickers from the collection. I love that several die-cuts have gold foil details, tying in with the gold of the paper clips.

Originally, I called this page ‘School is Cool’ but since this was the last day of school … and kids are pretty tired of the concept of school by then, I changed the title to ‘My Kids Are Cool’. And, yes! They are, indeed, COOL! Ha!

The die-cut pack comes with so many great icons. You also get two of each design. I LOVE that!

I finished the page with scattered puffy hearts and splatters of white paint in each corner of the design to tie everything together.

What a cute and colorful collection! Check out the Rosie’s Studio ‘Work of Heart’ collection HERE!

Thanks for stopping by!

JanaBold

JanaEubankYouTubeIcon JanaEubankIconFacebook JanaEubankIconInstagram JanaEubankIconPinterest