Simple Stories: Good Stuff Card Organizer!

I make lots of handmade cards, but you know what?! I am TERRIBLE at using them! For YEARS, I have wanted to come up with a system to get those cards out of the boxes I store them in and actually WRITE in them and then SEND them out to people … can you relate?

I decided to create a Card Organizer that will help me do just that. This binder isn’t necessarily a place to store all of the cards I make, but it *IS* a system for selecting those cards and putting them in a ‘queue’ (so to speak) ready to write in each month. Let me explain it a bit more.

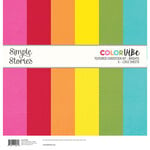
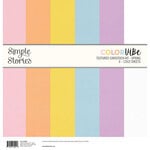
I used the Simple Stories 6×8 Black Stripe Designer Binder as the base for this project. I then used a variety of colors of Color Vibe cardstock to create pocket pages to go inside the binder.

Watch the video for more information!

On the front of each pocket is a calendar card from the Simple Stories Good Stuff collection and a list for each day of the month.

The idea is to write birthdays, anniversaries, etc. on the list, and then place cards for those occasions inside the pocket … ready to be written on. I can then keep this binder on my desk, by my bedside, wherever! to write and SEND the cards from my stash each month. It will serve as a ‘transition spot’ for the cards in between my storage box and the recipient. Great idea, right?!

Here is a closer look at each pocket in the album.

Did you like this project? Do you think that you will make one for yourself?

Let’s put this project to use and become card-giving ROCKSTARS this year!

Until next time!

JanaBold

SUPPLIES USED IN THIS PROJECT:

Take My FREE Class at Scrapbook.com!

IMG_1376

JanaEubankYouTubeIcon JanaEubankIconFacebook JanaEubankIconInstagram JanaEubankIconPinterest

American Crafts: Planning for the New Year

I love the beginning of a new year! I love re-evaluating how I spend my time and making goals for the coming months. A part of my process is setting up my planner. Next year I am using the Black & White Striped Planner by American Crafts. (There are other designs available, too! I will link all of them at the bottom of this post)
I love the size of these planners, since I mostly use the monthly pages in my planning. The larger format allows me lots of delicious space to work, plan, and decorate!
Today, I wanted to share the first four months of my planner with you. I used a variety of the new Sticker Books by American Crafts to decorate them and they turned out so cute! I can’t wait to use them in the coming months!
JANUARY
American-Crafts-Planner-Jana-Eubank-January-1-600
I love that the layout in this planner is basic black and white. It allows me to add lots of color with the products of my choice. For each monthly spread, I added washi tape across the top and bottom of the pages for color. I then used the month stickers from the Amy Tangerine Sticker Book to make the months POP!
American-Crafts-Planner-Jana-Eubank-January-2-600
The constellation washi tape on the January spread is from the Dear Lizzy Stargazer collection. It reminds me of a gorgeous clear, winter night sky!
I especially love the wood slice sticker marking my wedding anniversary. I added the pink heart sticker with our initials “carved” into it.
American-Crafts-Planner-Jana-Eubank-January-3-600
For the rest of the elements on the page, I used stickers from the One Canoe Two Sticker Book.
American-Crafts-Planner-Jana-Eubank-January-4-600
FEBRUARY
February gets its flair from the Shimelle Sticker Book.  I used the pink washi tape with black hearts from the Creative Devotion Washi Tape Set #2.
American-Crafts-Planner-Jana-Eubank-February-1-600
I love the florals with their gold foil in this sticker book. What girl doesn’t like their projects to shimmer and shine, right?!
American-Crafts-Planner-Jana-Eubank-February-2-600American-Crafts-Planner-Jana-Eubank-February-3-600American-Crafts-Planner-Jana-Eubank-February-4-600
MARCH
March is decorated with the rainbow colors of the Amy Tangerine Sticker Book. By March the birds start making their way back to our part of the state as the days begin to warm back up.
American-Crafts-Planner-Jana-Eubank-March-1-600American-Crafts-Planner-Jana-Eubank-March-2-600American-Crafts-Planner-Jana-Eubank-March-3-600
APRIL
I loved the softer colors of the Dear Lizzy Sticker Book for my April monthly spread.
American-Crafts-Planner-Jana-Eubank-April-1-600
The rabbit sticker was the perfect choice to mark Easter Sunday and the beginning of Spring Break. Those gorgeous gold foil letter stickers are from the One Canoe Two Sticker Book.
I also loved adding those bright, colorful dot stickers across the top to mark the different days of the week.

American-Crafts-Planner-Jana-Eubank-April-2-600American-Crafts-Planner-Jana-Eubank-April-3-600

Are you looking forward to the new year like I am? Make it that much more fun by decorating your planner using all of the fun stickers from the NEW Sticker Books!
SUPPLIES:

Wishing you lots of happiness in the coming new year!
JanaBold

JanaEubankYouTubeIcon_50 JanaEubankIconFacebook_50 JanaEubankIconInstagram_50

Reorganizing in My Scraproom

***Don’t forget to enter my current GIVEAWAY by Thursday night for a chance to win!***

After scrapping all of those Halloween pages last month, it got me thinking about how I store my supplies.

You see, I have always stored all of my Halloween and Christmas items together in a container. I love it! When I’m ready to scrap those holidays, I just pull down those containers and get to work. I don’t need to search my sticker bins, paper bins, embellishment bins, and stamp bins separately for Halloween items, because they are already stored together.

(Here’s a peek into my Halloween/Fall bin)

JanaEubank_ThemeBinFallOverhead

It got me thinking … why don’t I do that for more of my supplies? Not just Halloween and Christmas?

I got a bee in my bonnet and decided it was worth a try. I got out all of my paper and stickers/die cuts and started to think about how I could categorize them together.

Previously, I had my cardstock organized by color and paper organized roughly by manufacturer. This worked for me during my design team days when I had to scrapbook by manufacturer, but it’s different for me now.

Themed Collections (Still needs cuter labels! 🙂 )

JanaEubank_PaperThemes

I decided to keep collections together that I still wanted to use together (paper/embellishments) and organize them into themes of how I would search for them. The themes I categorized them by are Fall/Halloween, Winter/Christmas, Love/Valentine, Flowers/Spring, Summer/Travel, Family/Pets, Boy, Girl, School, Camping/Outdoors, Patriotic, and Birthday.

I did the same thing with my embellishments. So now, I can grab the Love/Spring/Floral paper holder, and the Love/Spring/Floral embellishment box and get to work.

(Here is a peek into the Love/Spring/Floral bin)

JanaEubank_ThemeBinHearts

For collections that are more general and can be used for anything, I categorized them into color families: Primaries, Brights, Pastels, and Muted/Neutrals.

For older paper collections that I’m ready to break up and mix together, I organized them by color alongside my cardstock. I looked through each piece of paper one-by-one, decided which side of the paper I was more likely to use, and then filed it under that color. In most cases, these are the “B-side” of the papers.

JanaEubank_PaperColorsClose

JanaEubank_PaperColorsFull

“So, where do you put papers with multiple colors? Or embellishments that are more general in nature and can be used for any occasion?” you might be asking.

For papers with lots of “personality” or multiple colors I decided to place them into their own section. They are separated roughly into color families: primaries, brights, pastels, and muted. Embellishments are the same way.

A sample of the papers placed in the Primary Personality Paper section.

JanaEubank_PrimaryPersonalityPapers

Brights/Pastels Color Bin

JanaEubank_ColorBinBrightsPastels

Primary Color Bin

JanaEubank_ColorBinPrimary

Muted/Neutrals Color Bin

JanaEubank_ColorBinMutedNeutrals

If I would like, I can also pull down the color bins along with a theme bin. For example, the Spring Bin with the Pastel/Brights bin.

Now, I have NO IDEA if this is going to work out for me. (For all I know, I’ll be changing it all back two months from now.) But, I think it is worth a try! I feel like I forget about a lot of my supplies, and I’m hoping that categorizing them differently will help me to come across them more often and remember to use them. I will let you know how it goes. 😉

Have you stored your supplies like this? Has it worked for you? I would love to hear your tips and tricks!

For my next few posts, I’ll be sharing Fall scrapbook layouts using my Fall paper and embellishment bins. I hope to see you then!

Thanks for coming by!

JanaBold

Creative Spaces Volume 2 Giveaway!

It’s that time of year where we pull down the holiday decorations and think to ourselves, “This place needs some organizing and decluttering!” I’m willing to bet that you’ve thought about cleaning out your scrap space, as well. I know I have! (Check out the bottom of this post to see my latest organization project.)

Creating Keepsakes magazine has read our minds again! Today marks the day that Creative Spaces Volume 2 is available! YAY! Now you will have all kinds of ideas at your fingertips to inspire you as you plan out your renewed space. Even better, Creating Keepsakes has allowed me the pleasure of giving away a copy to one of my readers! All you need to do is comment on this post by Sunday, January 13th, 2013. I will announce the randomly selected winner next Monday, January 14th. Or purchase your own copy NOW at the Creating Keepsakes website HERE. Take a SNEAK PEEK look at the issue by CLICKING HERE.

CreativeSpaces2-web

There are lots of opportunities to win this new issue. Be sure to check out the Creating Keepsakes Blog for more information.

Did you know that my scrapbook space was featured in Creative Spaces Volume 1? It was such an honor! If you want even more ideas, be sure to pick up Creative Spaces Volume 1 while you’re shopping for Volume 2!

CreativeSpaces1web

Along with everyone else I have been doing a little bit of organizing in my own creative space. Here is a look at my latest organization project.

Over the years, I have acquired a growing collection of embossing folders. I LOVE them! I have them all organized alphabetically in boxes, but it is quite cumbersome to flip through them to remind myself what patterns I have. Soooo …. I decided to create a reference book for myself. I purchased baseball card sheet protectors and a standard binder.

JanaEubank_EmbossBinder2b

Next, I used my computer to create 2.5″ x 3.5″ cards with the names of each of my folders on them. I included the company, folder name, and size of the folder. Then I embossed each of the cards with the corresponding folder.

JanaEubank_EmbossBinder4b

I LOVE my book! Having each card in it’s own slot allows me to see the front AND back of the pattern easily. I can group similar patterns together for easy comparison, and I can pull out the sample cards and hold them up to my project to see which pattern will work best. It’s been a great system. I hope you’ll give it a try! Here is a peak at a few more pages of my book.

JanaEubank_EmbossBinder3b

JanaEubank_EmbossBinder1b

Happy Scrapping!

JanaBold