Bella Blvd: Creating Stamped Cork Embellishments

Hello, friends! Today I am up on the Bella Blvd. Blog with a fun tutorial. It’s Stamping Week and I decided that I wanted to try something a bit different for my assignment. I pulled out a sheet of thin cork from my stash and used the Illustrated Faith Delight in His Day and Seeds of Faith stamps to create my own cork embellishments.

First, here is a look at the completed page.

TODAY I AM…

Jana Eubank Bella Blvd Today I Am Layout 1 600

First, I used red, blue, and lime green ink to stamp several images onto the thin cork sheets.

Jana Eubank Bella Blvd Stamping Steps 1 600

Then, I used various circle punches to cut them out. To ensure that I lined up the images the way I wanted them to appear, I flipped the punch over, so that I could align the image in the window.

Jana Eubank Bella Blvd Stamping Steps 2 600

The thin cork sheets punch out easily! Make sure you use a thin cork … the thicker cork sheets probably won’t even fit in the mouth/slot of your punch.

Jana Eubank Bella Blvd Stamping Steps 3 600

I repeated this process until I had a variety of sizes and images to work with.

Jana Eubank Bella Blvd Stamping Steps 4 600

The first thing I did was decide how I wanted to use the cork circles in my design. I decided to place a cascading column of the circles on the right side of the page, and then place my photo, title, and journaling on the left side.

Jana Eubank Bella Blvd Stamping Steps 5 600

Once I had finished the page, I went back to the column of cork circles and filled in the white space in between them with Puffy Crosses and Puffy Stars Stickers (Milk White, McIntosh Mix, Pickle Juice), along with a few splatters of Teal Color Shine Mist.

Jana Eubank Bella Blvd Stamping Steps 6 600

To balance out all the activity going on along the right side of the page, I added more visual weight to my photo by matting it with several layers of cardstock, patterned papers (Top Notch Paper, Sprinkled with Bliss Paper), and a sheet from the Crosses 6×8 Clear Cuts Pad. Everything is anchored on a vertical strip of Just the Ticket Paper and Borders Paper.

Jana Eubank Bella Blvd Today I Am Layout 1 600

I embellished the top left corner of the photo with a Designer Clip, Milk White Puffy Stars Stickers, and an arrow and phrase sticker from the Illustrated Faith Delight In His Day Fundamentals Stickers sheet.

Jana Eubank Bella Blvd Today I Am Layout 2 600

Below the photo, I placed my title. I wanted this page to be about how I am feeling about myself and my life lately, so I used the “Today” acrylic word, along with the letters from the Fundamentals Stickers Sheet to spell out the title of “Today I Am…” I followed that up with a few descriptive words and the date (created with my computer).

Jana Eubank Bella Blvd Today I Am Layout 4 600

A little bit of mist and a few more puffy star stickers, coordinate with the mist and puffy stickers going on along the right side of the page.

Jana Eubank Bella Blvd Today I Am Layout 3 600

One thing I love so much about Bella Blvd. collections are the bright happy colors … I couldn’t resist matting the entire page with the colorful Raise Me Up Paper. A line of blue stitching around the edge of the page and down the vertical strips of patterned paper finishes everything off!

Jana Eubank Bella Blvd Today I Am Layout 5 600Jana Eubank Bella Blvd Today I Am Layout 6 600

SUPPLIES:

OTHER SUPPLIES:
Cork Paper: Die Cuts with a View
Sewing Machine/Blue Thread
Brown Distressing Ink
Ranger Inks: Seaside, Ladybug, Cactus
Clear Acrylic Block
Various Circle Punches
Adhesive, Foam Squares
Trimmer/Scissors

Have you tried stamping on something other than paper lately? Give it a try! I had a lot of fun with this one and love how customized you can make your page look by creating your own embellishments.

Have a wonderful weekend!
JanaBold

JanaEubankYouTubeIcon_50   JanaEubankIconFacebook_50   JanaEubankIconInstagram_50   

Echo Park: Christmas Cards

Christmas is just around the corner and that means it’s time to get your holiday cards ready! Come join us for a “Week of Christmas Cards” on the Echo Park Paper blog.
Creating handmade cards for loved ones is like sending a paper hug. I love making them just as much as I love receiving them.
For my card today, I decided to create a tri-fold design using the gorgeous Christmas Delivery collection.
jana-eubank-carta-bella-christmas-delivery-card-1-600
Use a paper trimmer to cut a 5-1/2″ x 12″ block of Ebony Black Felt Designer Cardstock for the card base. Next, use a scoring tool to score the cardstock at 4-1/8″ and 4-1/4″ intervals.Fold into thirds.
jana-eubank-carta-bella-christmas-delivery-card-4-600
Next, use a scalloped border punch or scalloped patterned scissors to cut a decorative edge on the front panel.
jana-eubank-carta-bella-christmas-delivery-card-5-600
Use a manual die cut machine and the Floral Holly Die to cut several holly leaves and poinsettia flowers from Classic Green and Scarlet Red Felt Designer Cardstock. Set aside.
jana-eubank-carta-bella-christmas-delivery-card-3-600
Now, comes the fun! Pull out the Christmas Delivery 6×6 paper pad and select papers to go on each panel of the card, both on the insde and on the outside. Cut to size and adhere.
If desired, you can decorate the inside of your card, like I did here, with a strip of Plaid Decorative Tape, one of the poinsettia flowers, and two of the holly leaves. I placed an enamel dot in the center of the flower to give it a bit of dimension and shine.
jana-eubank-carta-bella-christmas-delivery-card-2-600
Let’s decorate the front of the card! First, place the red snowflake border from the 12×12 Element Sticker sheet just above the scalloped decorative edge.
Next, locate the “Christmas is Coming” die cut from the Ephemera pack. Tie a length of white twine around the die cut and adhere to the top right corner of the card.
jana-eubank-carta-bella-christmas-delivery-card-6-600
Layer together the present, “Dear Santa” letter, and “December” stickers from the 6×13 Chipboard sticker sheet. Adhere them to the front of the card in the lower left corner, as shown.
jana-eubank-carta-bella-christmas-delivery-card-7-600
Adhere a poinsettia flower and two holly leaf die cuts to the right of the “Dear Santa” letter. Add a trio of mini green enamel dots to the center of the flower.
jana-eubank-carta-bella-christmas-delivery-card-8-600
Finally, add two more holly leaf die cuts to the top of the card peeking out from behind the present sticker and your card is ready for sending!
jana-eubank-carta-bella-christmas-delivery-card-9-600
SUPPLIES:
Christmas Delivery Collection: 6×6 Paper Pad, 12×12 Element Stickers, 6×13 Chipboard, Plaid Decorative Tape, Enamel Dots, Ephemera Pack, Floral Holly Die, Classic Green Felt Designer Cardstock, Scarlet Red Felt Designer Cardstock, Ebony Black Felt Designer Cardstock , Manual Die Cutting Machine, White Crochet Twine, Trimmer, Scissors, Adhesive, Scalloped Scissors
Thanks for coming by!
JanaBold

JanaEubankYouTubeIcon_50   JanaEubankIconFacebook_50   JanaEubankIconInstagram_50   JanaEubankIconPinterest_50

Home Decor: Pennie’s Pumpkins

Before I get into today’s post, I wanted to remind everyone that today and tomorrow are the last days you have to enter for a chance to win this incredible Noel Mignon Blue Moon Daily Diary kit! All you need to do is create a scrapbook page inspired by one of my pages and post it to social media with the hashtag #liveinspiredchallenge. Details can be found on THIS GIVEAWAY POST. The winner will be announced on Friday! Good luck!

BMDDFULL-1_1024x1024

I serve with the most amazing gal in my congregation named Pennie Guinn. She is a crafting genius! She is the kind of gal who can see something made on the internet and break it down into steps that our 8 to 12 year old girls can recreate.

JanaEubank_Pumpkin18

This month she prepared the most adorable craft project for our girls to work on … Fabric Pumpkins! She saw these pumpkins presented on a local lifestyle show called Studio 5 last year and decided to make them into a class, complete with instructions, to share and teach to others. She has been so kind to share those instructions and her pumpkins with me so that I could share them with all of YOU here on my blog! Thank you, Pennie!!!

I had a BLAST creating my little pumpkin! It’s something that is easy enough to knock out in an hour or so. You could even create a whole patch of them in different sizes, if you’d like. So fun!

JanaEubank_Pumpkin16

As the girls worked, Pennie took the time to explain to them the value of learning a skill. We discussed how you could take a skill you have learned, the running stitch with a needle and thread, and use it in new ways. Here she is showing them doll clothes that she had made using fabric scraps when she was their age.The girls were FASCINATED! It was so cute!

BlogGroup

Let’s put one together, shall we?! 😀

JanaEubank_Pumpkin2

Pennie was so organized! She put together a kit for each of the girls with all of the supplies they would need.

Inside the kit was:

  • An 8×18″ rectangle of fabric, with the short sides stitched together to form a tube (also, with pencil lines across the top and bottom for the girls to use as a guide later)
  • a needle and two lengths of heavy thread
  • a baggie of walnut shell kitty litter
  • a bag of batting
  • 3 lengths of embroidery floss, approximately 30″ long each
  • a 3×3″ square of hand-dyed wool fabric for the stem
  • a hand-dyed wool leaf (I’m guessing she cut these with a manual die cutting machine, but you could also find a leaf shape online and handcut one if you would like.

Let’s get started!

JanaEubank_Pumpkin3

  1. Cut a rectangle of fabric. Size: decide width, double this measurement for length of rectangle. If the width is 8″, then the length will be 16″. Approximate measuring is good enough. Adjust the measurements and proportions to make any size or shape. Remember, the “width” will result in the height of your pumpkin. (NOTE: The fabric in our kit was 8×18″. She changed the proportions for ours a little bit because she liked the way it looked.)

JanaEubank_Pumpkin4

2. With right sides of the fabric together, fold the rectangle in half (two 8″ edges together); sew 1/4″ seam, backstitching at the beginning and end. This will make a tube (7-1/2″ x 8″).

3. Start with wrong side of fabric out. With strong thread, hand sew a running stitch (big 1/4″ stitches are okay) all around the edge of one side of the tube 1/4″ from the edge. (Note: you are not sewing the fabric together, you are just stitching all along the top edge of the tube.) Pennie drew a pencil line as a guide for the girls to follow.

JanaEubank_Pumpkin5

Pull to gather tight and knot well to secure. When finished, turn fabric right side out, with the seam on the inside. The gather will form the bottom of the pumpkin.

JanaEubank_Pumpkin6

4. Put 1 cup ground walnut shells kitty litter in a baggie. Place in bottom of the pumpkin for weight.

JanaEubank_Pumpkin7

Fill the rest of the pumpkin with batting. Don’t pack too tightly. It will need a little bit of “give” to tie the spines on later.

JanaEubank_Pumpkin8

4. Gather the top of the pumpkin in the same way you did the bottom, stitching all along the edge…

JanaEubank_Pumpkin10

… and then pulling together and tying knots to secure. There will be a small hole at the top of the pumpkin. This is where we will tuck in the stem.

JanaEubank_Pumpkin11

But first, we are going to create the spines of the pumpkin!

5. Spines of Pumpkin: Cut 3 lengths of embroidery floss to about 30″ long. Using all 6 strands of the floss together, start at the top of the pumpkin, wrap all around and back to the top. Pull and knot. Do this two more times, spacing the floss around the pumpkin in equal wedges, creating 6 “spines.” Don’t cut the ends!

JanaEubank_Pumpkin12

6. Stem: Use a short piece of a stick and poke into the hole at the top of the pumpkin. OR you can roll up quilt fabric or wool (3×3″ square), and poke in the top hole for the stem. Use a pencil or something similar to help you work the stem down into the hole.

JanaEubank_Pumpkin13

Add a wool leaf, by tucking the end in the same hole with the stem. If desired, you can make a stitch or two to secure the leaf in place. We just tucked them in.

JanaEubank_Pumpkin14

7. Tendrils: Dampen the embroidery floss with starch (I actually used hairspray on mine, hehe!), and wrap around a pen or pencil. Tape the ends, if needed, to hold the threads in place while they dry. (We placed a folded paper towel underneath the pencil to protect the fabric of the pumpkin.)

JanaEubank_Pumpkin15

When dry, gently unwrap the tendrils; trim and separate as desired.

JanaEubank_Pumpkin16

Camryn LOOOOOVED this activity! Can you tell?! She enjoyed learning how to do a running stitch and being able to create something that she will keep and use forever! I told the girls to put their pumpkins safely in their “hope chests” so that they can enjoy them year-after-year. Infact, they could even teach their own children how to create a pumpkin someday!

JanaEubank_Pumpkin17

Pennie shared with me more of her adorable pumpkins … I love all of the different fabrics she used, and the way she adorned some of them with beaded tendrils, and even charms! So CUTE!

JanaEubank_Pumpkin19

MORE IDEAS (from Pennie):

These cute pumpkins are great for using up your fabric stash. Consider a variety of colors, not just typical “fall” ones. I have tried different sizes; have found big ones (size of a real pumpkin) take a ton of batting and aren’t as charming as the small ones, in my opinion.

These are simple enough for a family craft. If the cutting and machine sewing is done in advance, children old enough to sew with a needle can do it with some adult help.

A small one, packed with more walnut shells and batting makes a cute pincushion.

They make nice hostess gifts, are light-weight to mail, and easy to store. Make a bunch and enjoy.

Pennie

(Credits: Design: Kris Thurgood, My Girlfriend’s Quilt Shop, guest on Studio 5)

JanaEubank_Pumpkin20JanaEubank_Pumpkin21

I KNOW! You are itching to go make yourself an entire patch of pumpkins now, aren’t you?! And guess what?! They are so easy to do … you could even create several of them to decorate your Thanksgiving table if you’d like. I hope you’ll share your pics with us! We both would love to see them!

Have fun!

JanaBold

More Fun with the eBrush!

This Wednesday is Craft Day at HSN and I will be there in the background with Lisa Bearnson to help with her shows. If you’d like to tune in here are Lisa’s showtimes.

lisa hsn blog JUNE230

Last month Lisa debuted the Craftwell eBrush Airbrush machine on HSN. Thanks to all of you it sold out! But it will be back again this Wednesday. If you didn’t catch it the first time and would like to see what it’s all about be sure to tune in! I’ve shared a few of my projects with you HERE and HERE using the eBrush machine. Here are some more things I created.

First, a few paper projects.

ENJOY

I created the sunset background for this card by using scraps of paper as masks. First, I cut a wavy border and sprayed tan along the bottom for the sand. I flipped the wavy strip over to cover the sand and then sprayed the top left corner of the card with yellow. Next, I used a punch circle as a mask for the sun by placing it over the yellow mist I just put down. Then, I used orange, pink and purple sprayed in concentric circles out from the sun mask, softly blending the colors into one another (I hope I’m making sense here). It was so much fun to do! Everything else on this card was cut out using my Silhouette Cameo machine with black glitter cardstock. Then, I finished it all off with a few metal flower embellishments from a past Basic Grey collection.

Janaeubank_eBrush_EnjoyBeachCard_600

I ONLY HAVE EYES FOR YOU

On this page, I used the eBrush to mist each of the hearts, giving them a dimensional look by holding the eBrush closer to the hearts along the edges.


JanaEubank_eBrush_EyesOnly1_600

JanaEubank_eBrush_EyesOnly2_600

I also used the eBrush to dress up the word “EYES” in the title and the hearts in the middle of the glasses.


JanaEubank_eBrush_EyesOnly3_600


Next up is a bunch of fabric projects! And no, the permanent markers I used to spray do not wash out. The eBrush comes with 6 different adaptors for popular markers you have in your stash. For the ones that didn’t fit exactly, I just used a bit of masking tape or washi tape around the barrel of the pen to make it fit. Hehe! (Hint, Hint: You can buy an AWESOME set of knock-off Sharpie pens in 24 colors for $12 at Walgreens … PERFECT for projects like these!)

Here are some fun projects I created for babies … onesies and bibs! Awwww! So cute!

JanaEubank_eBrush_BibApple_600

JanaEubank_eBrush_BibElephant_600

JanaEubank_eBrushFabric_OnesieDeer_600

JanaEubank_eBrushFabric_OnesieDuck_600

JanaEubank_eBrushFabric_OnesieLookinGood_600


I found this butterfly clip made out of feathers at Michaels’ and had fun spraying it up with the eBrush.

JanaEubank_eBrush_FeatherButterflyClip_600

Look how cute it looks pinned to this little canvas bag (striped sprayed with the eBrush).

JanaEubank_eBrush_ButterflyBag_600

Here is another mini canvas bag that I turned into  a gift for teacher.

JanaEubank_eBrushFabric_TeacherGift_600

Speaking of gifts, here are a couple of fun gift packaging ideas.

BUTTERFLY BAG

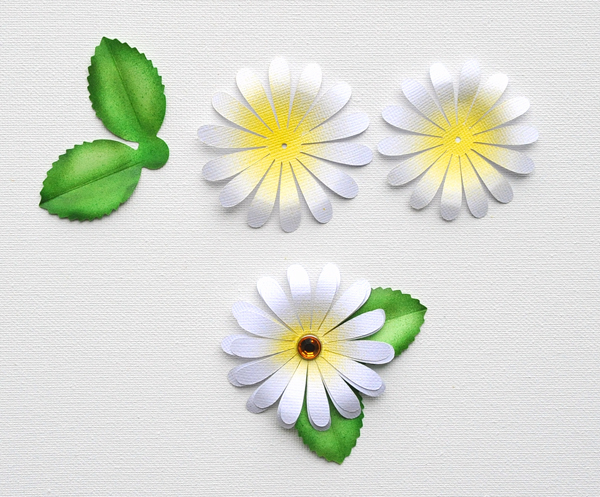
I sprayed a plain white gift bag in a variegated rainbow. Then I cut out the flower and butterflies using my Silhouette Cameo machine. The center of the flower looks more realistic with a spray of yellow in the flower center.

JanaEubank_eBrush_RainbowGiftBag1_600

JanaEubank_eBrush_RainbowGiftBag2b_600


Here is another paper flower.

JanaEubank_eBrush_Flowers_600


FLORAL GIFT BOX

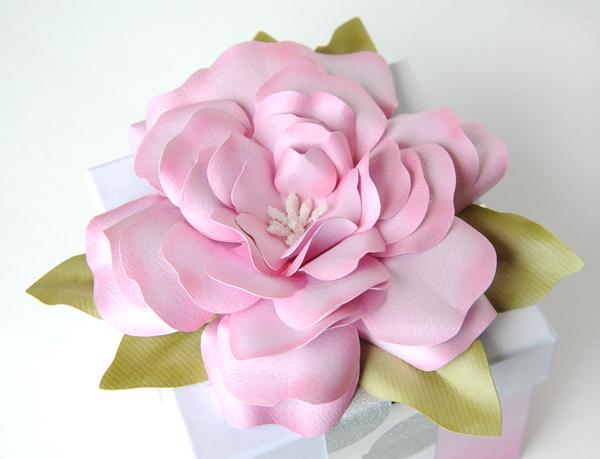
I used the eBrush to create an ombre effect on the sides of this gift box, and then sprayed the edges of my paper flower (created with the Silhouette Cameo machine).

JanaEubank_eBrush_GiftBox1_600

JanaEubank_eBrush_GiftBox2_600


How about some home decor projects?

JanaEubank_eBrush_HSNLettersWhite1_600


NOEL CANVAS

This project was inspired by THIS beautifully airbrushed cake that I found through Pinterest. I can’t wait to set this on my table in my entry way this Christmas!

JanaEubank_eBrush_NoelCanvas1_600

JanaEubank_eBrush_NoelCanvas2_600

One of the coolest things you can do with the eBrush machine is to use food safe marker pens! Again, depending on the brand you buy, you may have to tape up the barrel of the pen to get it to fit snug in one of the adaptors, but the Wilton pens fit great in the Sharpie attachment (if I’m remembering correctly). Here are some fun food items (smooth surfaces work best) I made with the food color pens! Now, I am not a food crafter, but I can know I will definitely be using this machine once in awhile for birthdays, etc. So FUN!

FLOWER COOKIES

I used my Silhouette Cameo machine to cut out the mask for this flower using THIS design from the Silhouette Cameo store. I simply hid the sections for each color so I could spray the leaves by them selves, the flower, and then the entire flower (so I could cover it and do the blue background).

JanaEubank_eBrush_CookiesFlower1Group_600


JanaEubank_eBrushFood_CookiesFlowers2Single_600


A simple heart on a cupcake for Valentine’s Day.

JanaEubank_eBrush_HeartCupcake_600

Or use your Silhouette Cameo machine to trace a logo or custom image. I used light blue for the entire logo and then gave the appearance of a darker blue around the edges, by misting the edges with a purple food marker.

JanaEubank_eBrushFood_CookiesHSNLogo1Group_600


You can even add color to the white writing of a premade cake from the bakery.

JanaEubank_eBrushFood_HappyBirthdayCakeWithMarkers_600


These cupcakes get a rainbow effect. The HSN letters a sprayed onto Necco candy wafers. using a letter mask created on my Cameo machine.

JanaEubank_eBrushFood_HSNRainbowCupcakes_600

JanaEubank_eBrushFood_RainbowCupcake2Single_600


Here is the same idea using Valentine colors of pink and red. Again, the hearts were sprayed onto Necco Candy Wafers using the negative shape of a heart cut in cardstock as a mask (punches are perfectly sized for this).

JanaEubank_eBrushFood_ValentineCupcake1Group_600

JanaEubank_eBrushFood_ValentineCupcake2Single_600


I hope you enjoyed seeing what you can make using the NEW eBrush from Craftwell. Be sure to watch Lisa on HSN this Wednesday for a live demonstration of this fun machine!

JanaBold