My New Job at Simple Stories!

Last week it was announced that I’m back at Simple Stories and I’m more excited than ever to tell you about the new program I will be overseeing … Simple Stories Online! Simple Stories Online are online workshops from Simple Stories that will be taking place every other month featuring one of their latest-and-greatest collections.

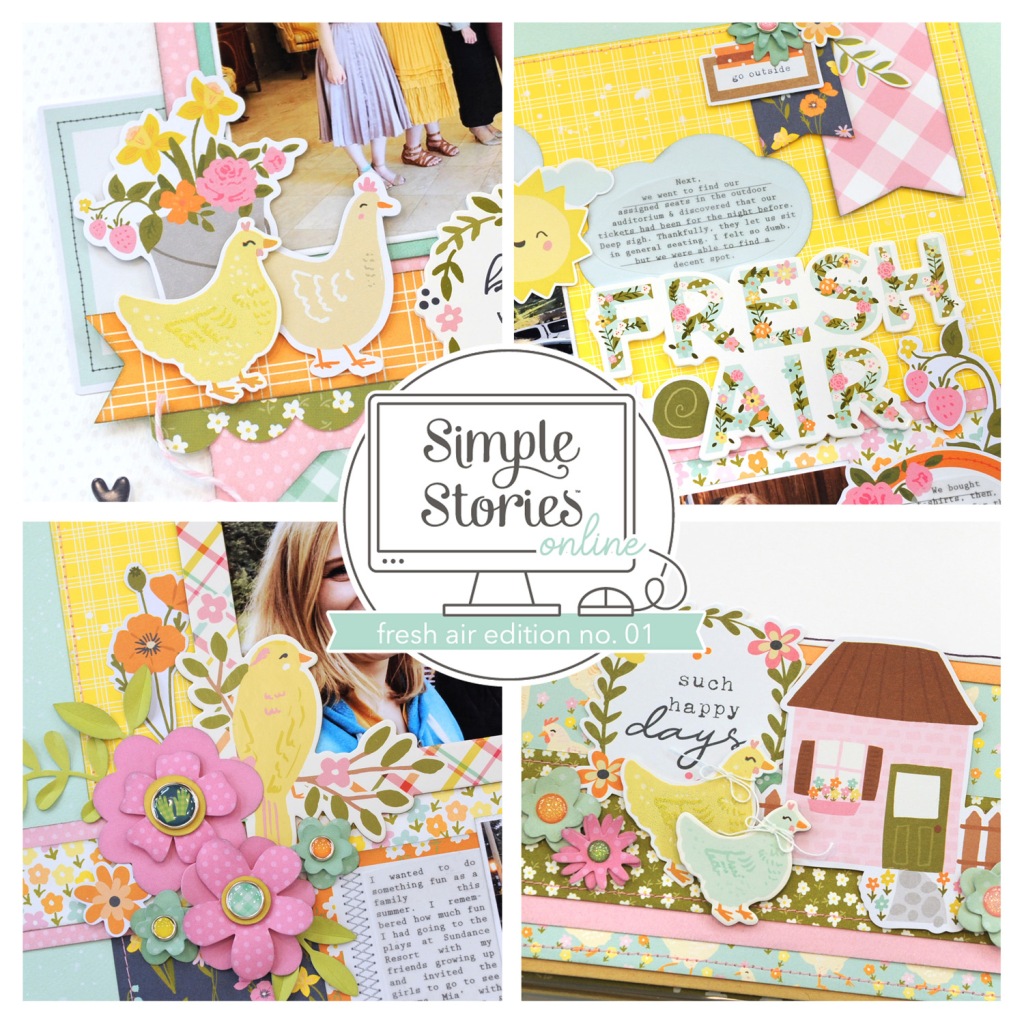
The first event will take place in March 2024 and is for sale NOW! The Fresh Air Event will feature the darling Fresh Air collection. We will be making layouts, a 6×8 SN@P! Binder, and additional bonus projects. The cost of the event is the same as the products, so when you purchase your kit, you are receiving the EXCLUSIVE class projects, instructions, LIVE experiences, and community as a BONUS! It’s an amazing value!

We have formatted the schedule for the classes a bit differently, spreading them out over the month so that you have time to focus on each project. We want to fit into your creative life and help you get into a pattern of creating! It’s going to be so much FUN!

There is LOTS of information about this NEW program, the schedule for March’s event, SNEAK PEEKS of March’s projects, and the schedule for the remainder of the year over on the Simple Stories website. CLICK HERE to check it out!

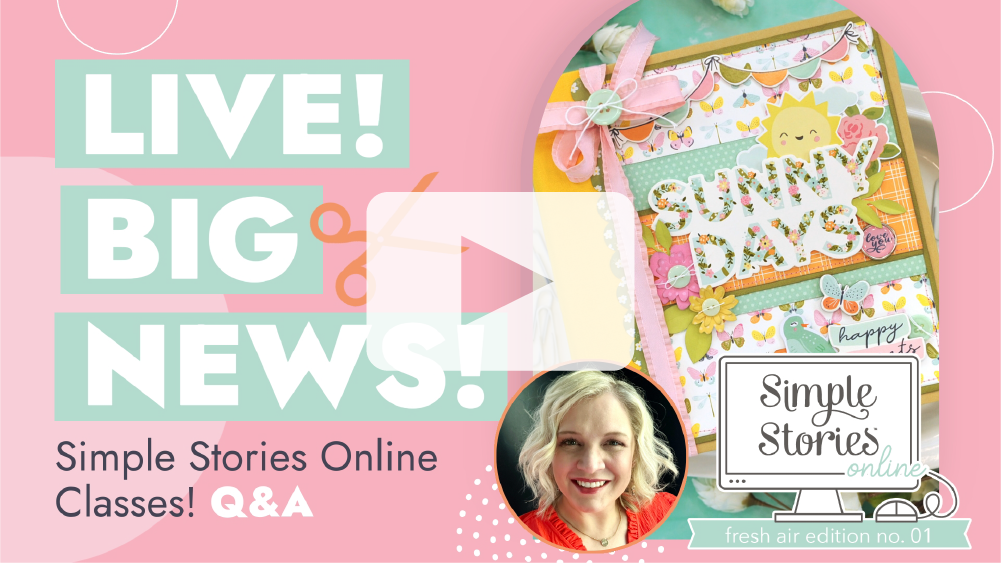
I also did a LIVESTREAM last week talking about everything. You can watch that on my YouTube channel HERE.

Come CREATE with me in March! Class Kits are LIMITED and will begin shipping in Mid-February.

If you have any questions, feel free to leave them here!

Happy creating!

JanaBold

JanaEubankYouTubeIcon JanaEubankIconFacebook JanaEubankIconInstagram JanaEubankIconPinterest

SCT Love Week: Heart Eyes Mini Album!

Hello, Friends! Today I am sharing my FIRST project for the Scrapbook and Cards Today Magazine Creative Team. What a thrill it is to be a part of this group of talented designers. I have followed and learned from these ladies for years. I can’t wait to create alongside them this year. Thank you to Catherine and the SCT Team for giving me this opportunity!

Becki AdamsWendy Sue AndersonMeghann AndrewVictoria CalvinMari ClarkeNathalie DeSousaLisa DickinsonMindy EggenJana EubankPaige EvansJess ForsterDilay NacarVirginia Nebel, Latisha Yoast

This week on the SCT Blog it is LOVE WEEK! We are celebrating all things hearts, flowers, chocolate, and the people we ADORE!

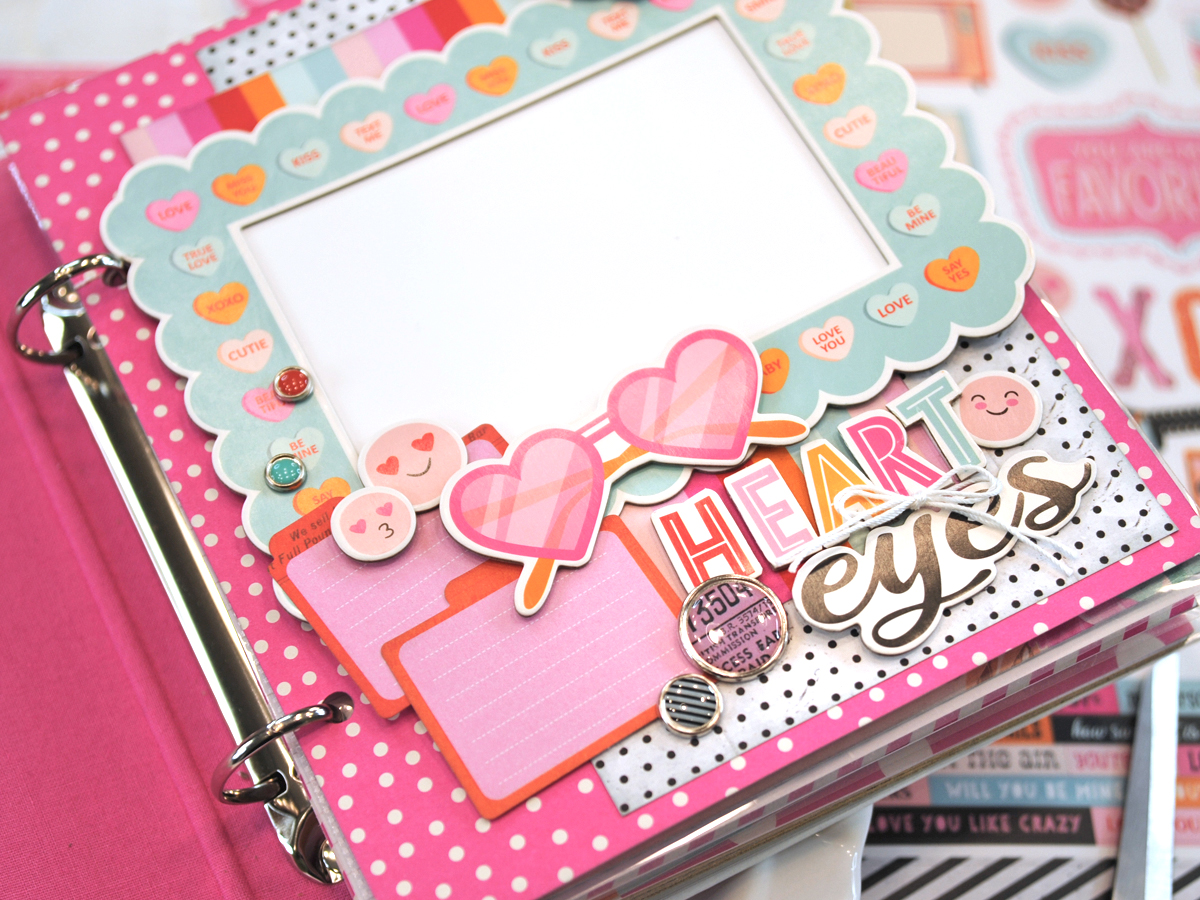
For my project, I created a lovey-dovey, Valentine mini album using the Simple Stories Heart Eyes collection. This album is the perfect gift for the one you adore. Fill it with favorite photos of the two of you along with memories and stories that you hold dear.

When designing a mini album, I like to start with the front cover first when I have all of my supplies to choose from. This allows me to select my favorite pieces from the collection and create a design with a big impact that will beckon the viewer inside.

For this cover, I paired a couple of large heart stickers (Cardstock Stickers) with a fussy-cut heart from the 6×8 paper pad to create a cascading design on the front cover. I placed the ‘LOVE’ title (Foam Stickers) on the largest heart. I added more texture to the foam title by tying white twine around the first letter, then adhering shiny Decorative Brads to the last letter. The brads are my favorite! There is just something about those little cuties that makes me want to place them EVERYWHERE!

Making a mini album is easy when you begin with a Simple Stories 6×8 SN@P! Binder. The binders come in a wide variety of colors to coordinate with your project. (Have you seen the THREE Limited Edition colors they released this spring? Wowza!) Before decorating the binder, I used tape to mask off the pink linen binding and then painted the kraft portion of the album with white paint. After the paint was dry, the album was ready to decorate!

The album includes insert pages, pocket pages, and chipboard tabs. I opted to use one of the pink insert pages as the foundation of my title page. I layered together a few of the 6×8 patterned papers, then added a Chipboard FrameJournal Bits & Pieces die-cutsChipboard pieces, and Decorative Brads to frame my focal point photo. I plan to put my favorite photo of my husband and me on this first page.

The Foam Stickers create stunning titles with lots of dimension and are used throughout my album. Of course, I had to add adhesive Decorative Brads throughout as well. They are the perfect finishing touch for each spread!

The pocket pages inside the 6×8 Binder are so easy and fun to use! I like to treat each individual pocket as a mini layout, layering up patterned papers and adding my favorite embellishments to highlight my photos and journaling. On the right page, you can see I even added an interactive element to one of the pockets by designing a shallow pocket that contains two tags. One tag will hold journaling, and the other a small photo.

Don’t forget to include the story of how you and your loved one met! The journal insert pages provide lots of room for all of the important details. I used the Clear Stamps with coordinating Color Vibe cardstock to create a banner across the top of the journal page, then embellished the lower portion of the page with additional accents.

I created a short video of this album if you would like to see it ‘in action’. Also in that video, is a flip-thru of a 4×6 Flipbook I created using the same Simple Stories Heart Eyes collection. Click on the video below to watch!

Grab your favorite supplies and create a mini album documenting all the reasons you care for the one that you love. What could be better this Valentine’s Day?

See you next time!

JanaBold

SUPPLIES USED IN THIS PROJECT:

Take My FREE Class at Scrapbook.com!

IMG_1376

JanaEubankYouTubeIcon JanaEubankIconFacebook JanaEubankIconInstagram JanaEubankIconPinterest

Simple Stories: Good Stuff Card Organizer!

I make lots of handmade cards, but you know what?! I am TERRIBLE at using them! For YEARS, I have wanted to come up with a system to get those cards out of the boxes I store them in and actually WRITE in them and then SEND them out to people … can you relate?

I decided to create a Card Organizer that will help me do just that. This binder isn’t necessarily a place to store all of the cards I make, but it *IS* a system for selecting those cards and putting them in a ‘queue’ (so to speak) ready to write in each month. Let me explain it a bit more.

I used the Simple Stories 6×8 Black Stripe Designer Binder as the base for this project. I then used a variety of colors of Color Vibe cardstock to create pocket pages to go inside the binder.

Watch the video for more information!

On the front of each pocket is a calendar card from the Simple Stories Good Stuff collection and a list for each day of the month.

The idea is to write birthdays, anniversaries, etc. on the list, and then place cards for those occasions inside the pocket … ready to be written on. I can then keep this binder on my desk, by my bedside, wherever! to write and SEND the cards from my stash each month. It will serve as a ‘transition spot’ for the cards in between my storage box and the recipient. Great idea, right?!

Here is a closer look at each pocket in the album.

Did you like this project? Do you think that you will make one for yourself?

Let’s put this project to use and become card-giving ROCKSTARS this year!

Until next time!

JanaBold

SUPPLIES USED IN THIS PROJECT:

Take My FREE Class at Scrapbook.com!

IMG_1376

JanaEubankYouTubeIcon JanaEubankIconFacebook JanaEubankIconInstagram JanaEubankIconPinterest

Simple Stories: Say Cheese Christmas SN@P! Album

Merry Christmas, friends! Recently, I went to Scrapbook.com to film a few segments for Simple Stories, including the Say Cheese Christmas collection and the SN@P! Binder Bundle available at Scrapbook.com. (You can view the video at the bottom of THIS PAGE at the Scrapbook.com or on their YouTube channel, if you’d like!)

This is a great bundle to use for your Christmas vacation to a Disney destination, but with a few slight adjustments it is versatile enough to use for your at-home holiday memories as well!

Capture 1

I created an album with the kit, adding in the Say Cheese Christmas collection kit so I could use the 12×12 papers to add layers and interactive elements. I also added in a few of my favorite Photo Flips. I’ve had a few requests to post pictures of the individual pages, so here you go! Enjoy!

1 Jana Eubank Simple Stories Say Cheese Christmas SNAP Album2 Jana Eubank Simple Stories Say Cheese Christmas SNAP Album3 Jana Eubank Simple Stories Say Cheese Christmas SNAP Album4 Jana Eubank Simple Stories Say Cheese Christmas SNAP Album

Below, I scored the top of the 4×4 black castle card to create an interactive flap covering the 4×4 photo beneath.

5 Jana Eubank Simple Stories Say Cheese Christmas SNAP Album6 Jana Eubank Simple Stories Say Cheese Christmas SNAP Album

For this pocket, I scored a piece of patterned paper in half, and then tucked the back panel in the pocket for a fold-over card. This creates additional space for photos and journaling!

6b Jana Eubank Simple Stories Say Cheese Christmas SNAP Album

I trimmed the top and bottom off of the red confetti dot page included with the SN@P! album to add in a different sized page. (save the top and bottom strips to use as layers in other spots of the album)

7 Jana Eubank Simple Stories Say Cheese Christmas SNAP Album

The blue card on the red page is scored on the left edge, creating a flap. Use the tab to lift the flap and view more photos!

7b Jana Eubank Simple Stories Say Cheese Christmas SNAP Album

A simple strip of patterned paper creates a pocket for journal cards and photos!

8 Jana Eubank Simple Stories Say Cheese Christmas SNAP Album9 Jana Eubank Simple Stories Say Cheese Christmas SNAP Album

This z-fold page is a fun way to add interest to your album!

9b Jana Eubank Simple Stories Say Cheese Christmas SNAP Album10 Jana Eubank Simple Stories Say Cheese Christmas SNAP Album10b Jana Eubank Simple Stories Say Cheese Christmas SNAP Album

Want to add journaling, but you don’t want everyone to read it. Add it to a tag and then tuck it in between the photos or cards in the pocket pages (like I did behind the green snowman card below).

11 Jana Eubank Simple Stories Say Cheese Christmas SNAP Album

I used a circle punch to cut out the word “M-E-R-R-Y” from the 2×2 cards for the title on the page below.

12 Jana Eubank Simple Stories Say Cheese Christmas SNAP Album13 Jana Eubank Simple Stories Say Cheese Christmas SNAP Album

Try creating a tri-fold element with a decorative scalloped edge!

13b Jana Eubank Simple Stories Say Cheese Christmas SNAP Album

Use a craft knife to cut a slit in a page pocket and add hidden journaling that slides out from behind a 4×4 Element card.

The pocket on the right was created by adhering a 4×6 piece of patterned paper to a 4×6 photo. leave the right side blank, creating a pocket for additional photos or journaling. I created a tab for the slide-out photo by folding a punched circle over the edge.

14 Jana Eubank Simple Stories Say Cheese Christmas SNAP Album15 Jana Eubank Simple Stories Say Cheese Christmas SNAP Album

Here I used an oval die to cut windows in the red 6×8 SN@P! page. I then adhered it to another page along the top, left, bottom, and horizontal center. I left the right side open as a pocket and placed photos, cut in the shape of tags, in the pockets. You can write your journaling behind the photos on the grid paper. CUTE!

16 Jana Eubank Simple Stories Say Cheese Christmas SNAP Album17 Jana Eubank Simple Stories Say Cheese Christmas SNAP Album

On the back of the grid page, I created a large flip-out page by scoring the left edge of a large piece of patterned paper.

17b Jana Eubank Simple Stories Say Cheese Christmas SNAP Album

This Photo Flip opens downward revealing more photos.

17c Jana Eubank Simple Stories Say Cheese Christmas SNAP Album18 Jana Eubank Simple Stories Say Cheese Christmas SNAP Album

These 4×4 Element cards were scored on opposite sides, creating flaps that open both ways.

18b Jana Eubank Simple Stories Say Cheese Christmas SNAP Album19 Jana Eubank Simple Stories Say Cheese Christmas SNAP Album

Score 2″x4″ pieces of cardstock and adhere 2″x2″ Element cards on the front of them for lots of little flaps!

19b Jana Eubank Simple Stories Say Cheese Christmas SNAP Album20 Jana Eubank Simple Stories Say Cheese Christmas SNAP Album

Or simply score a journal page vertically to create a narrow page that opens up to reveal your story.

20b Jana Eubank Simple Stories Say Cheese Christmas SNAP Album21 Jana Eubank Simple Stories Say Cheese Christmas SNAP Album

A 4×6 Photo Flip covers the pocket on the bottom of this 6×8 pocket page, opening up to reveal additional photos.

21b Jana Eubank Simple Stories Say Cheese Christmas SNAP Album22 Jana Eubank Simple Stories Say Cheese Christmas SNAP Album23 Jana Eubank Simple Stories Say Cheese Christmas SNAP Album24 Jana Eubank Simple Stories Say Cheese Christmas SNAP Album25 Jana Eubank Simple Stories Say Cheese Christmas SNAP Album26 Jana Eubank Simple Stories Say Cheese Christmas SNAP Album

I hope you feel inspired to create your own Christmas album. This is such a fun project to do and products from Simple Stories makes it easy!

See you next time!
JanaBold

IMG_1376

JanaEubankYouTubeIcon_50 JanaEubankIconFacebook_50 JanaEubankIconInstagram_50